Baristas tend to be inclined to focus on all the minutiae of their craft. Their scales are in place, their towels are exactly where they need them – isolated based on purpose: dairy, portafilters, counter-tops – their kettle temperature is precise.
One thing, however, that is commonly (although increasingly less so these days in our experience) overlooked, is work area cleanliness.
There’s no bigger red-flag for us than when we enter a café and see baristas trudging through a swampland of espresso grounds, spilled milk, and syrups, preparing drinks on crusty counter-tops, all the while their towels are in place, at the ready, thirsty for action.
A dirty café presents a poor image by calling into question the quality, sanitation, and safety of the product - and even the staff - of the offending cafe. No one wants to enjoy (or in this case, perhaps attempt to enjoy) their coffee in an environment they feel uncomfortable, much less unsafe, in.

Cleaning, in the context of café life, isn’t confined to some “to-do” item points on the nightly closing list. Adhering to a simple, regular cleaning regimen is an easy way to ensure great tasting coffee, maintain a clean workspace and maximize the lifespan of equipment (it ain’t cheap, after all!).
The Espresso Machine
Most cafes serve a majority of their drinks from an espresso machine, be it in the form of espressos, Americanos or milk-based beverages. The espresso machine is also typically the most expensive piece of equipment in a shop – or office.
Shops depend on their espresso machines to be properly operating. More than that, however, espresso machine manufacturers are paying more attention to the aesthetics of their equipment and these machines are often centerpieces in cafes, grabbing the attention of guests with their sleek designs.
It seems clear enough why we’d want to keep these machines clean and running smoothly – but how do we do it?
Devoting a few seconds between drinks, a few minutes between shifts, and ~20 minutes at the end of the day to cleaning the espresso machine is all it takes to keep your espresso machine properly cleaned.
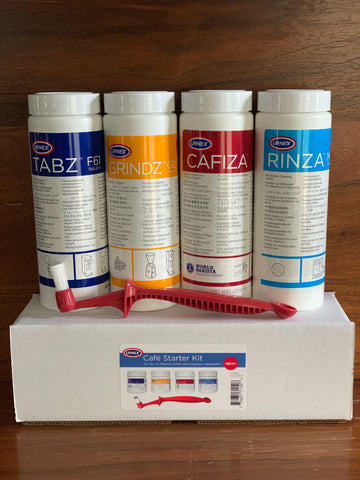
You will need the following items for efficient and effective cleaning:
- Espresso machine cleaning detergent (such as Cafiza or similar product)
- Milk-wash (such as Rinza or similar product)
- A container to soak portafilters and screens in
- Scotch pad or similar rough scrubbing pad
- 2 bar towels
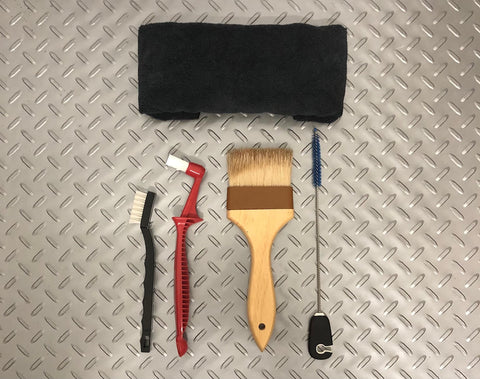
- Nylon group head brush
- Short, flat-head screwdriver or Pallo Caffeine Wrench
- A back-flushing disk (“blind-basket”)
...now let’s get to work.
Espresso Machine Cleaning Procedures
Some cleaning procedures are required after every drink
- Wipe the steam wand clean with a clean, damp towel designated for use solely with the steam wands. Your steam wands interact directly with the beverage that guests will be consuming in every milk-based drink; therefore, it is essential the steam-wand rag not be used for wiping down countertops, spills or any other task aside from cleaning steam wands. When improperly held, dairy products can develop bacteria that are dangerous if consumed. Health and safety are vital in a food-service environment and milk should never be allowed to dry on a steam wand.
- Remove spent coffee puck from portafilter and purge the group head with clean water. Oils found in coffee can become rancid when exposed to oxygen and heat. Buildup of oils and old coffee grounds will impart off-flavors to coffee brewed through dirty group heads and dirty screens. By removing the spent coffee from the portafilter and running clean water through the group head immediately after a drink is served, high-quality espressos can be maintained. It is also a good practice to brush off the screen and around the gaskets periodically throughout a shift (not necessarily after every drink)
- Brush/wipe down counter and work area. Coffee grounds and small amounts of milk can form a big mess quite quickly. Even a good barista in a good café looks sloppy if they are working in a giant swamp of milk and coffee. When allowed to build up these messes can be rather time-consuming to clean, however, a few seconds between drinks easily keeps a workspace looking clean.
After Every Shift
5. Backflush group heads with clean water. Insert portafilter equipped with backflushing disk into the group and initiate brew cycle. Let the water run for about 10 seconds, stop the cycle and let rest for about 5 seconds. Repeat this process several times on each group head. With the blind filter inserted the water is forced back up through the group head loosening old coffee grounds and oils and flushing out the drainage tubes.
6. Brush off dispersion screens and around gaskets with nylon brush.
7. Remove baskets from portafilters, rinse baskets and portafilters with clean water and scrub off with a Scotch pad. This will remove oils and other coffee residues.
8. Wipe down all external surfaces of the espresso machine (front and back) with a clean, damp towel followed by a clean, dry towel to keep the machine appearing clean and preserve the finish.

At the End of the Day
Back-flush the machine with espresso machine detergent using the following steps.
- Place the back-flush disc - or "blind" blasket - into the portafilter.
- Insert the portafilter into the group head and initiate the brew cycle. Let the water run for about 10 seconds, stop the cycle and let reset for about 5 seconds. Repeat this process 3-4 times.
- Repeat Step 2 for each group head.
- Add a small amount of Cafiza espresso detergent into the portafilter with the blind basket (approx. 0.5 tsp).
- Insert the portafilter into the group head and initiate the brew cycle. Let the water run for about 10 seconds, stop the cycle and let reset for about 5 seconds. Repeat this process 3-4 times.
- Repeat steps 4 and 5 for each group head.
- Thoroughly rinse blind basket.
- Do 3-4 cycles of back-flushing on each group head with hot water only (no Cafiza).
- Remove portafilters from group heads and pop out the baskets using a flat-head screwdriver. Scrub baskets and portafilters with pad.
- Remove the dispersion screens and screws from each group head and thoroughly scrub with scrub pad to remove all coffee grounds and oils. These items can be added to the portafilters and other items soaking in coffee detergent.
- Sprinkle a small amount of cleaning detergent into the vessel in which you wish to soak your portafilters (approx. 2 teaspoons per portafilter) and add portafilters and popped-out baskets.
- Fill container with hot water (the hot-water spigot on a coffee brewer is a great place to grab the water from) until all metal parts are submerged (be careful not to submerge the plastic hand guards on the portafilters or the chemicals will eat away at and damage them). Allow to soak for at least 10 minutes.
- Dip the nylon brush into the detergent solution and proceed to thoroughly scrub the gasket and diffuser block on each group head.
- Once the portafilters and baskets have completed their soak (about 15 minutes), rinse them thoroughly with clean water and reassemble (do not discard the cleaning solution they had soaked in).
- Replace the screens and screws on each group head, being careful not to over-tighten the screws (this will warp and damage the screens).
Clean the remainder of the espresso machine using the following steps.
- Remove drain tray grates and drain tray and wash with hot, soapy water then dry.
- Pour leftover cleaning solution, reserved from soaking the portafilters, into the drain box.
- Scrub the drain box clean and rinse with hot water.
- Replace drain tray and grating.
- Add one tablespoon of milk wash to each of two steaming pitchers and fill them with hot water. Submerge steam wands into the pitchers and turn on the steam valve for a few seconds. Soak for at least 10 minutes (soaking over-night is not necessary and NEVER soak over-night if you are turning the machine off or once the steam boiler cools it will siphon cleaning solution into the boiler).
- Remove solution from steam wands, thoroughly wipe each wand with a clean, damp towel and purge each for several seconds. Thoroughly rinse steaming pitchers.
- Wipe all external surfaces of machine with a clean, damp towel followed by a clean, dry towel. Use of cleaning product such as Windex should not be necessary, however, if using such a product spray onto towel and never directly onto the surface of the espresso machine.
Espresso Grinders
Some cleaning procedures for your espresso grinders will need to be addressed every day.
For daily cleaning, use the following steps.
- Close bean hopper slide and run grinder until all remaining coffee has been ground out.
- Remove the bean hopper from grinder and empty coffee from the hopper.
- Return hopper to grinder and run Grindz grinder-cleaner through the grinder.
- Remove hopper once again. Wipe out the inside of the bean hopper with a clean, dry cloth.
- Thoroughly brush grinder burrs with a brush then run the grinder for a few seconds to allow dislodged coffee and residual Grindz to exit.
- Thoroughly wipe out dosing shaft.
- Wipe all external surfaces of grinder with a clean, damp towel followed by a clean, dry towel.
Using Grindz
Running grinder cleaning products through the grinder (literally grinding it as if it were coffee) cleans the burrs by dislodging ground coffee deposits and absorbing oils. If oily coffees are not being used and regular cleaning is performed, however, this should not be necessary.
Note: While this section focused on espresso grinders, the process is the same for bulk coffee grinders but all steps above may simply not apply.

Coffee Brewers
At the end of the day clean coffee brewing equipment using the following steps.
- Empty and rinse out all brew baskets.
- Empty all coffee urns.
- Place appropriate amount of Tabz or similar coffee brewer cleaning material into brewing basket (1 tab for each .5 gallon of water).
- Run a full batch of water through the brew basket into the urn and let the urn soak for about 30 minutes then drain the urn. Repeat for all urns/baskets.
- Use a large brush to brush clean the insides of each urn.
- Run two batches of clean water through each basket and urn.
- With clean, damp towel wipe off the spray heads that release the water over the brew baskets.
- Wipe down all external surfaces of brewers and urns with a clean, damp towel followed by a clean, dry towel.
Once a week, perform the following cleaning procedures on your brewing equipment.
- Remove spray heads, rinse them and inspect holes for blockages. If blockages are identified use a toothpick to clean the holes. Wipe out above spray heads and replace.
- Remove the spout assembly and clean with a mild soap. While the spout is removed, use a brush to clean out tube that feeds spout from the urn. Rinse spout components, reassemble and replace on urns.
